You’ve probably wondered how to cut LED strips. In this article, we’ll cover how to use a tape measure and a miter saw to cut LED strips. Using copper points, we’ll also discuss how to cut LED lights within the circuit line. Regardless of whether you’re cutting strips to illuminate your home or for an outdoor project, you’ll want to make sure you’re following the directions correctly. For best results, read the article in its entirety before attempting this task.
Cutting an LED strip
There are two common methods for cutting an LED strip. One is to cut it at the end, and the other is to lengthen it. Both methods will work with a strip of 30 or 60 LEDs per meter. The smaller number of LEDs per meter is used for home decoration. The larger number of LEDs per meter is used for accent lighting, such as on beacons and signs. In both cases, the length of the strip can be easily cut to desired length.
To solder the LED strip, cut the plastic covering off the end. To do this, take a box cutter or a sharp knife and carefully cut the plastic over the copper dots. Then, solder the wire over the copper spots. Make sure to match the polarity of the wire to the LED strip. After soldering, you may now install the LED strip. Once completed, you can place it in your device. It will look great in no time.
To cut the LED strip, measure the length of the strip and follow the cut line nearest to the measurement. Once you have measured the length of the strip, use a ruler or tape measure to mark where each light connects to the next. The dotted cut line on the strip corresponds to the LED length. To install the LED strips, it is important to keep them connected to a power source, which is why you need to connect them to an electrical network.
To make sure that your LED strip is intact, follow these simple steps. Start by removing the protective film and adhesive on the back of the strip. Then, use 3M double-sided tape to secure the strip. Be careful not to cover the front of the strip with any tape, as this will ruin the lighting effect. Afterwards, you can connect the LED strips to the new location and test for proper functioning. Once you have completed the procedure, you can begin the installation process.
Once you have a cut line, you can begin the LED strip installation process. LED strips come in 50 or 100-meter coils, and you can cut them every one meter. Be sure not to cut the strip too close – the LEDs will not light up. If you happen to cut the strip too close, you can always join the split ends together by welding connection wires. To start cutting an LED strip, you need to start with a four-pin connector, which is characterized by rounded or pointed spikes. The connector should match the aluminum sheets and the plug/connector.
Using a miter saw
If you’re looking for a quick and easy way to cut LED strips, you may want to consider using a miter saw. This type of saw has a large table that serves as both the base and work surface. To ensure a smooth and precise cut, you’ll want to align the fence with the material that you want to cut. After that, you can adjust the bevel tilt and angle of the blade accordingly.
First, make sure that you use a miter saw that has a fence that is wide enough for the size of the piece that you’re cutting. If the fence does not provide enough support, the cut could result in kickback. The best way to prevent this problem is to use a sacrificial board or a wood block that you can set back at least half an inch. During the cut, it is important to keep your hands out of the way of the blade. Once you reach the desired cut, be sure to apply even pressure on the piece to avoid turning it over.
If you are using a miter saw, it is important to make sure that you are using the right blade. The blades can wear out very quickly and may fail during use. If you don’t care to use a sacrificial wood saw blade, you may end up with a rough cut. So, you should choose a miter saw that features a saw with a high-quality blade.
Before you begin cutting LED strips, you should wear protective gear such as safety glasses, gloves, and earplugs. You may also want to invest in a miter saw blade guard to protect your hands from the sharp blade. Always unplug the saw when you’re finished. After you’ve finished using the saw, make sure to unplug it and remove the cord. If you want to change the blade, make sure to unplug it and take off the saw when you’re finished using it.
A miter saw’s guard protects the user by preventing the blade from blowing out. To prevent splinters from forming, you can place a scrap piece beneath or behind the workpiece while cutting it. Make sure that all components are in the enclosure, and that everything works correctly. After that, you can use the miter saw to cut led strips. In addition to using a miter saw to cut LED strips, you can also use the mobile app of Home Depot to locate products and check their inventory.
Using a tape measure
Using a tape measure to cut LED strips is essential for cutting them properly. If you don’t, you can end up with a large mess later on. If you don’t cut your LED strips accurately, you can end up damaging them, burning circuits, and damaging wires. If you are unsure of how to cut them, try these tips. They will help you get the right cut every time.
The first thing that you must do is to measure the length of the LED strip. LED strips come in long reels ranging from three to 16 feet long. Cut them down to the size that you need. Be sure that the strip is not bent when you are cutting it. Also, do not cut the strip too thin because this will result in a short circuit. Using a tape measure will ensure that you get a perfect cut every time.
Next, you should use a wire stripper to remove about half the copper casing from the strips. When you are finished, solder the wires to the LED. You can then repeat this process with another LED. When you are finished, plug the strip into the power source and test it to make sure that it is working. If you don’t cut your LED strips properly, you risk damaging them.
Using copper points
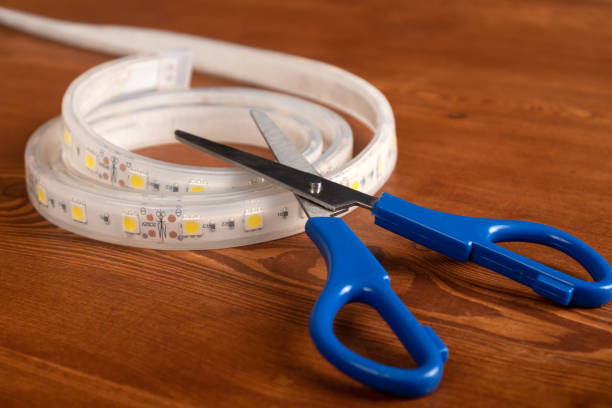
Before cutting the LED strips, you need to understand how the LEDs are connected. To do this, you must locate the right cutting spot. The ideal spot is every three LEDs. There are exposed copper points on both sides. The right tool to use is a sharp work knife or good pair of scissors. Then, cut the strips at the right spot. Once cut, the wires can be soldered. It is important to remember that the wires must match polarity.
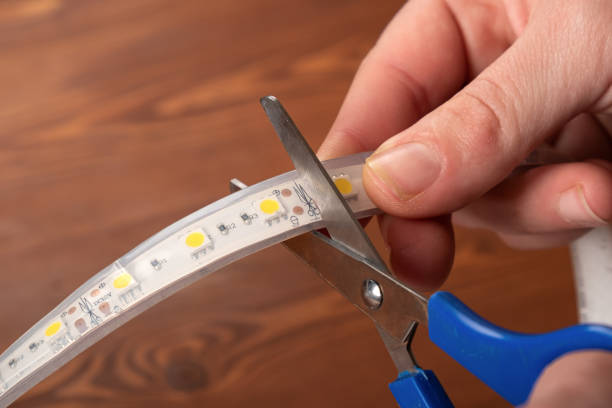
Once you know how to use a pair of scissors, you can cut LED light strips. Hold the strip firmly and cut through the copper dots or dotted lines. Be careful while cutting, since incorrect alignment may cause LEDs to break. Once you have cut the strip, be sure to align it properly before connecting it to the LEDs. Once you have made sure that everything is aligned correctly, you can proceed with the installation of the lights.
Also Read: The Ultimate Guide to Connecting LED Light Strips
Be careful when cutting LED strips, as improper cutting will result in irreversible damage. Be sure to cut the strip in the correct spot; if you cut outside the cutting line, you will kill each individual circuit. The other danger to cutting LED lights is that you may accidentally kill the circuit. Always remember to cut along the same line as the cutting line to avoid this problem. Otherwise, you may end up damaging the LED strips.
After you’ve cut the LED strip, you need to connect the strips by using a snipping tool. Using copper points to cut LED strips can make them more precise. You can check whether the cutting line is accurate by looking at the copper soldering pads on both sides of the strip. If all goes well, both sides of the LED strip light should function. In case of any damage, the copper points are the location where the circuit breaks.